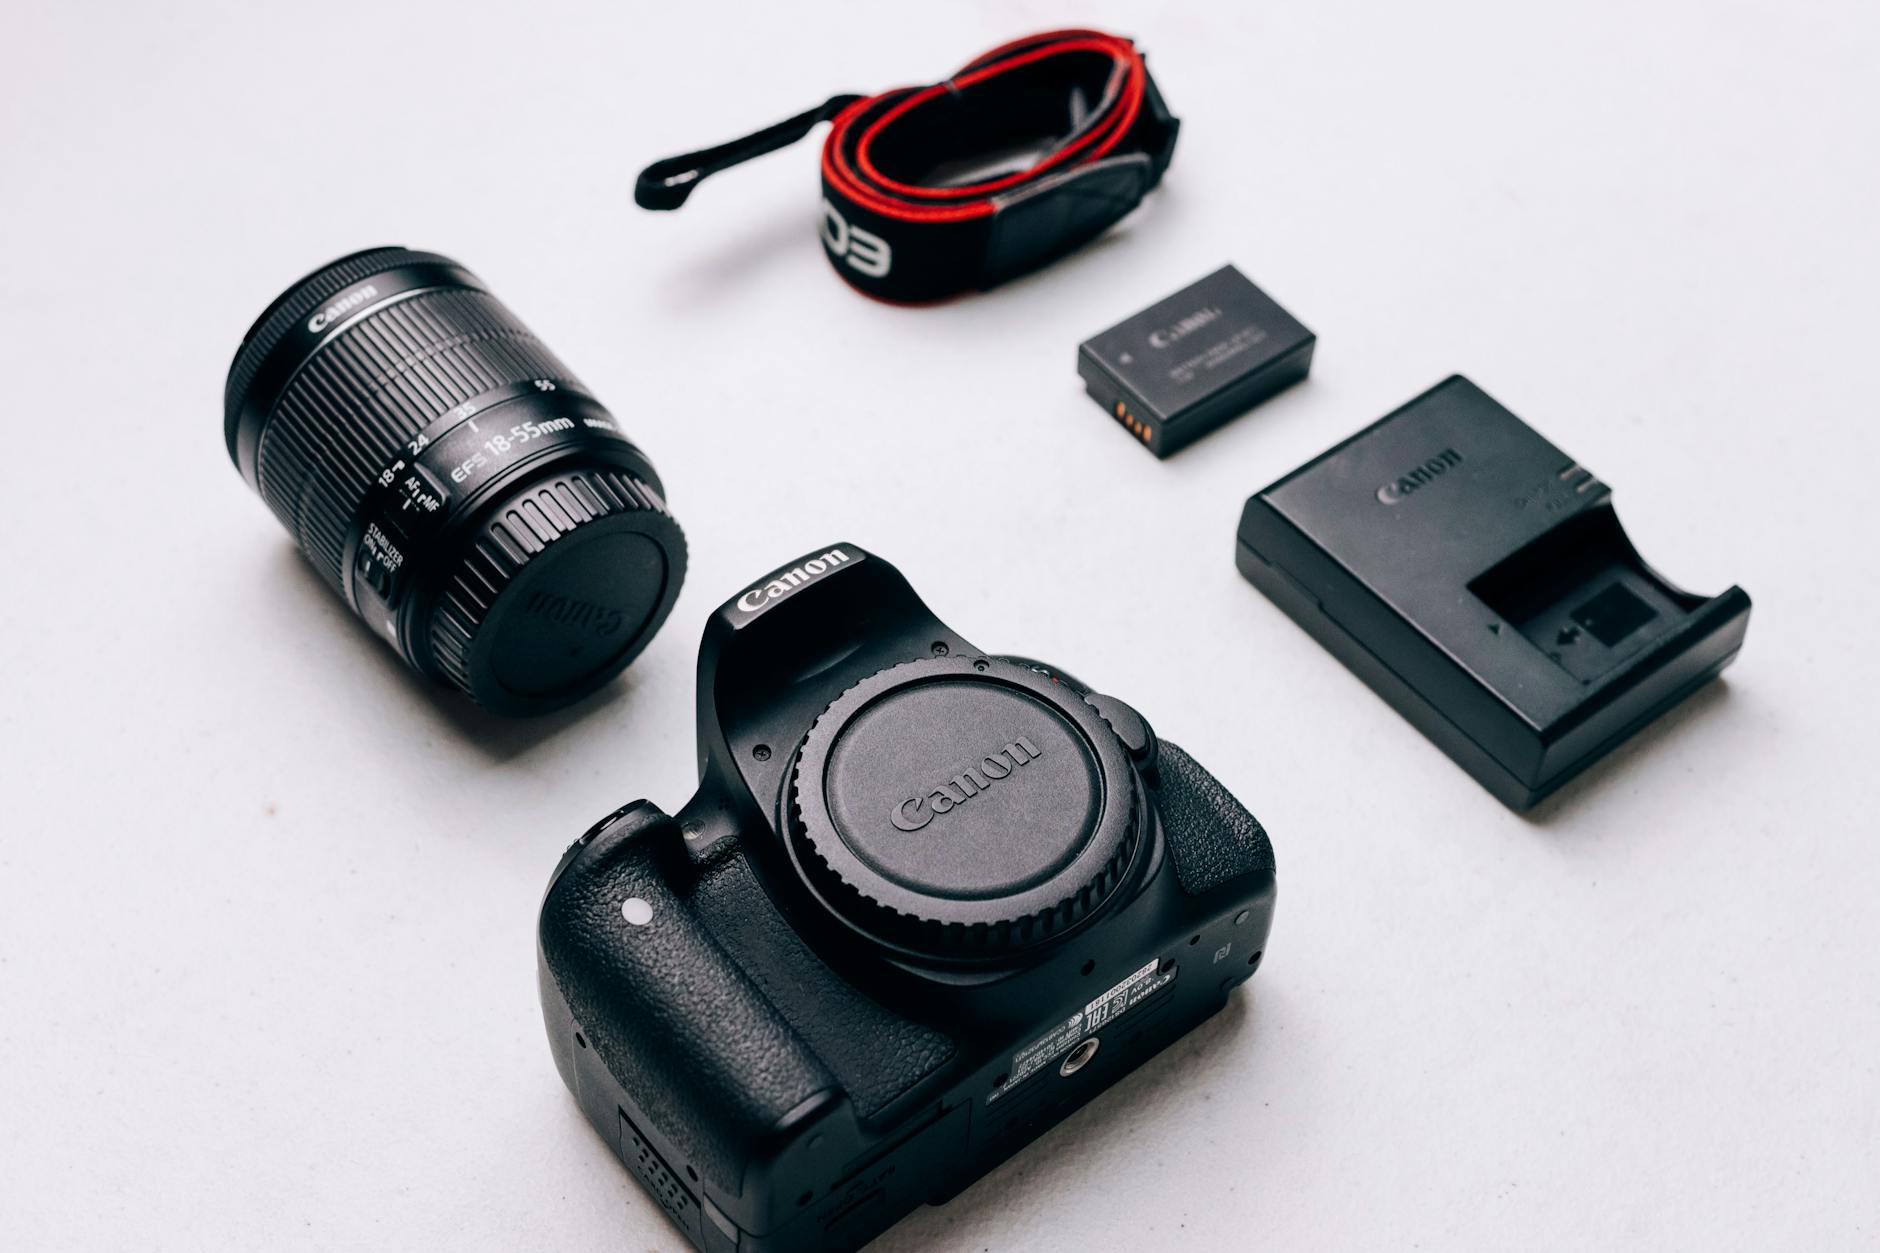
What photography equipment does a beginner actually need in 2026?
Quick answer: In 2026, a beginner photographer needs seven essentials: an entry-level mirrorless or DSLR camera with manual mode, a versatile kit zoom lens (such as an 18-55mm), at least one 64GB UHS-I SD card, a spare battery, a stable tripod, a padded camera bag, and a basic lens cleaning kit. Everything else — flashes, filters, lighting stands — can be added later as your skills and shooting style develop.
New to photography? Discover exactly what gear you need in 2026 — cameras, lenses, tripods, bags, and accessories — with honest budget-tier recommendations and a free checklist.
Key Takeaways
- Start with a camera body, kit lens, SD card, spare battery, tripod, bag, and cleaning kit — nothing more.
- Entry-level mirrorless cameras now outperform older DSLRs at comparable price points in 2026.
- Budget tiers exist for under $500, under $1,000, and under $2,000 — each tier is viable for beginners.
- Buying quality used gear from reputable resellers can cut costs by 30–50% without sacrificing performance.
- The 50mm f/1.8 prime lens is the single best value upgrade after your kit zoom lens.
- Gear quality matters far less than consistent practice, learning light, and understanding composition.
- A simple 3-2-1 backup strategy (3 copies, 2 media types, 1 offsite) protects your photos from day one.
What Photography Equipment Does a Beginner Actually Need?
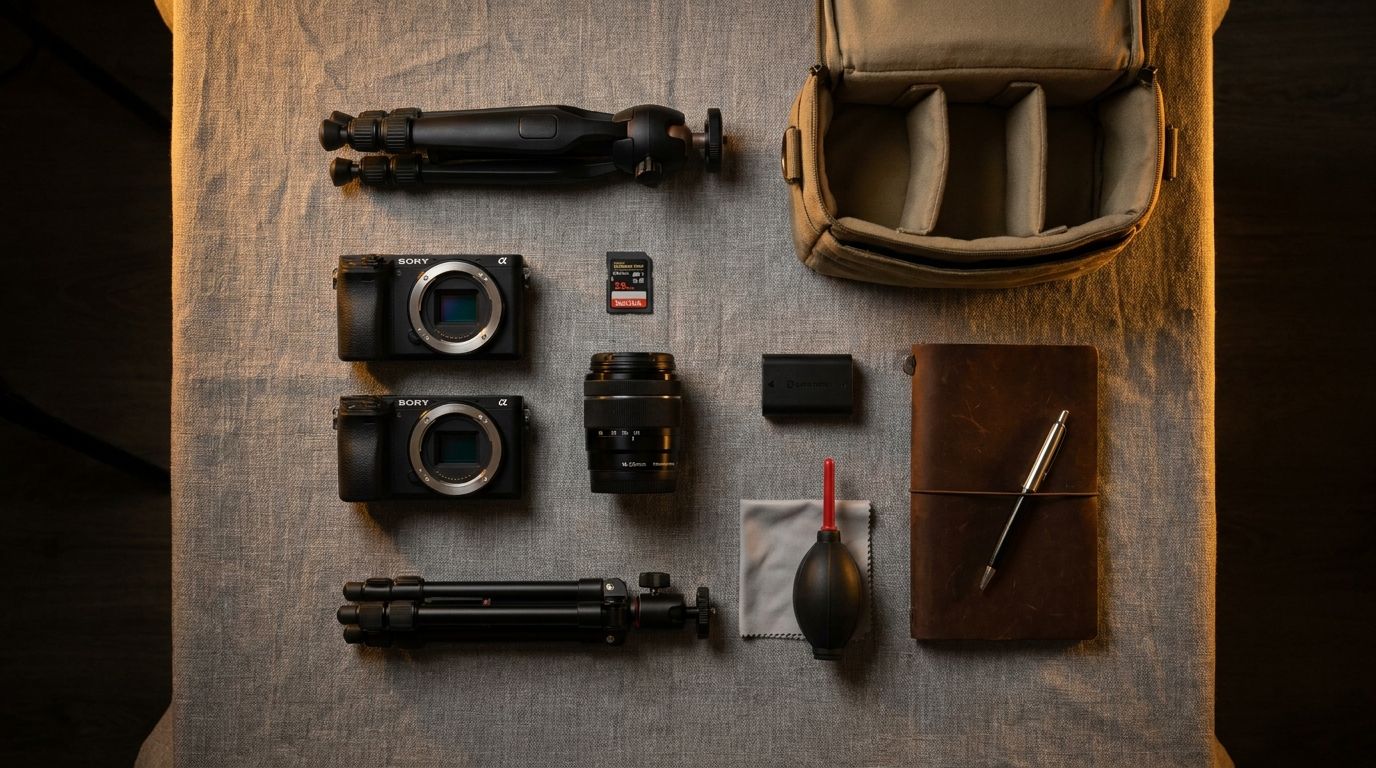
Here's the reality: walk into any camera store or scroll through a gear forum for ten minutes, and you'll convince yourself you need to spend $3,000 before taking a single photo. You don't. After eight years of shooting weddings and commercial work, I can tell you the gear that actually matters fits in a small backpack and costs a fraction of what most beginners think.
If you want a single, scannable answer to "what do I need to start photography," here it is.
The 7 Beginner Photography Essentials
- Entry-level mirrorless or DSLR camera body with manual mode
- Kit zoom lens (typically 18-55mm) bundled with the camera
- At least one 64GB UHS-I SD card from a reputable brand
- Spare manufacturer or reputable third-party battery
- Sturdy tripod rated for your camera and lens weight
- Padded camera bag or backpack
- Basic lens cleaning kit (microfiber cloth, air blower, lens cleaner)
That's it. If you walk out the door with those seven items, you can shoot anything from a portrait session to a sunrise landscape and produce work you'll be proud of.
💡 Gear Won't Replace Skill > > I've seen photographers with $8,000 setups produce mediocre work, and I've seen kids with secondhand entry-level cameras shoot portfolios that landed them paid clients. The single biggest predictor of how good your photos look is how many times you've pressed the shutter and studied the result. Learning light, composition, and your camera's manual controls will improve your photography faster than any upgrade. Promise.
Phone vs Dedicated Camera: Do You Even Need a Camera to Start?
Honest answer? No. Modern smartphones produce genuinely impressive images, and if you're not sure photography is going to stick, your phone is a perfectly valid starting point. I shot for a year before I ever picked up a "real" camera, and a lot of what I learned about composition came from that period.
That said, phones hit walls. You can't swap lenses, low-light performance gets ugly fast above ISO 1600, and you don't get full manual control over shutter speed and aperture — which you need to actually learn photography rather than just take pictures.
Upgrade to a dedicated camera when:
- You're ready to learn manual exposure (aperture, shutter speed, ISO together)
- You want to experiment with different lenses and look
- You've outgrown your phone's low-light or zoom capabilities
- You're starting to think about photography as more than a casual hobby
No judgment if you stay on a phone. This guide is here for when you're ready for the next step.
The 7 Essential Pieces of Photography Equipment for Beginners
Essential photography equipment is the minimum kit a beginner needs to learn manual exposure, protect their investment, and produce reliable results: a camera body with manual mode, one lens, a memory card, a spare battery, a tripod, a bag, and a basic cleaning kit. Everything beyond this list is a "buy when you need it" purchase, not a starting requirement.
💡 Prioritize in This Order > > Buy the items in the checklist order. Camera first, then lens (if not bundled), then storage and protection. Beginners who buy a flash, three filters, and a reflector before they've shot 1,000 frames on their kit lens almost always regret the spend. Master the basics first.
Why Each Item Earns Its Place in Your Kit
- Camera body: Your creative tool. Without it, nothing else matters. You need manual mode — anything else and you're stuck on training wheels.
- Lens: Determines focal length, depth of field, and low-light capability. Long-term, the lens is arguably more important than the body — bodies depreciate fast, good glass keeps its value.
- SD card: Your storage medium. A slow or unreliable card can corrupt files, miss shots during burst shooting, or fail at the worst possible moment. Don't cheap out here.
- Spare battery: Cameras die mid-shoot. A second battery costs $20–$50 and prevents the moment you'll never get back.
- Tripod: Essential for low-light, long exposures, self-portraits, and consistent framing. Forces you to slow down and be deliberate — which is itself a learning tool.
- Camera bag: You're carrying around $500–$2,000 of gear. Treat it like it.
- Cleaning kit: Dust on your sensor or lens shows up in every single photo. Basic cleaning takes 30 seconds and saves hours of post-processing.
Choosing Your First Camera
The camera body is where most beginners overspend. Let's break down the actual decision: mirrorless or DSLR, what specs matter, and which current models are worth your attention.
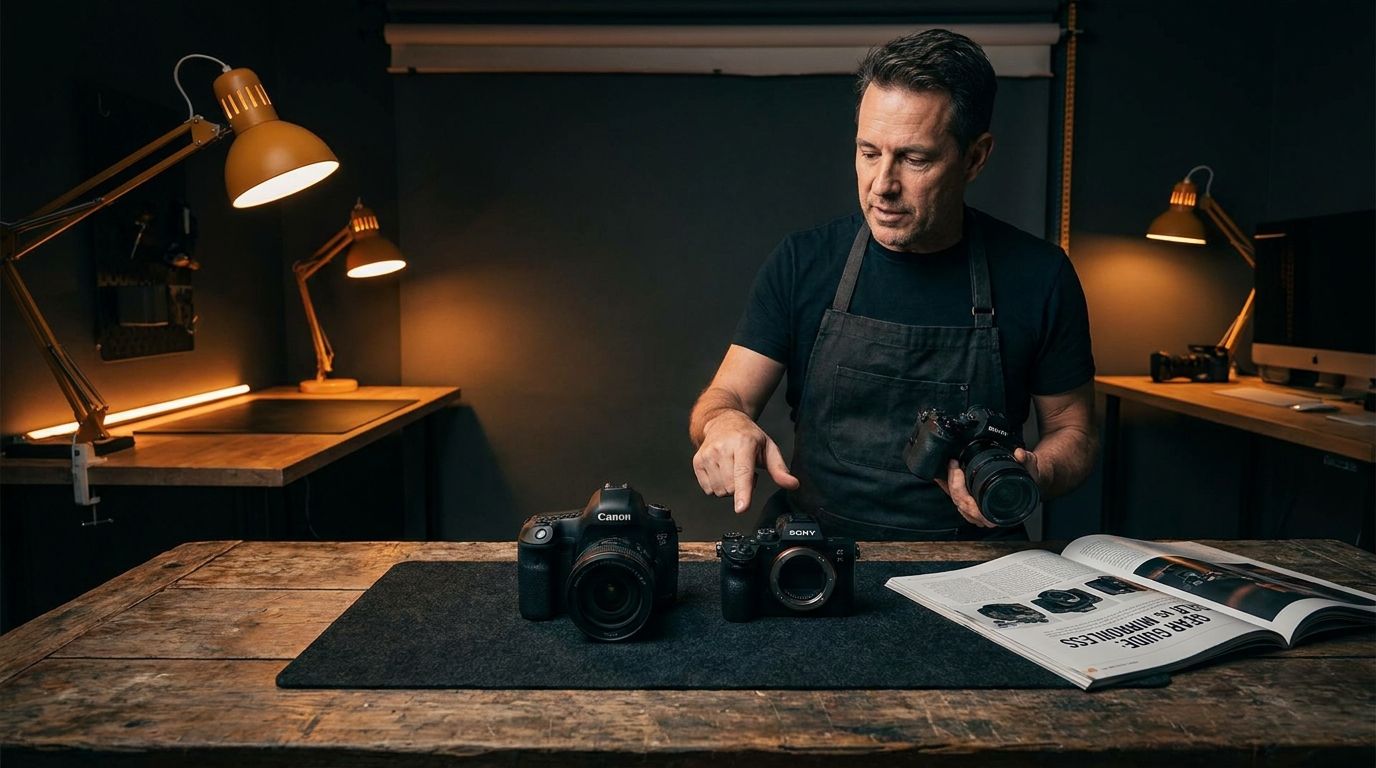
Mirrorless vs DSLR: Quick Comparison for Beginners
| Feature | Mirrorless | DSLR |
|---|---|---|
| Body size & weight | Smaller, lighter | Larger, heavier |
| Battery life | 300–500 shots/charge typical | 600–1,200 shots/charge typical |
| Autofocus system | Phase-detect on sensor; strong eye-tracking | Excellent through optical viewfinder; weaker in live view |
| Lens ecosystem | Growing rapidly; newer mounts | Mature, huge used market |
| Video quality | 4K standard at most price points | Limited at entry level |
| Entry-level body-only price | ~$600–$900 (new) | ~$400–$700 (new); much less used |
| Winner for beginners | Generally yes in 2026 — but both are valid |
According to CIPA's global shipment data, mirrorless cameras now make up the overwhelming majority of new interchangeable-lens camera shipments. Major manufacturers have effectively stopped developing new DSLRs, which is why the recommendation for most beginners starting fresh in 2026 leans mirrorless.
Current Entry-Level Camera Picks for Beginners (early 2026)
| Camera | Type | Sensor | Key Strength | Approx. Price (Body Only) |
|---|---|---|---|---|
| Canon EOS R50 | Mirrorless | APS-C | Beginner-friendly menus, strong eye AF | ~$650–$750 |
| Sony ZV-E10 II | Mirrorless | APS-C | Hybrid photo/video, vlogging features | ~$900–$1,000 |
| Fujifilm X-T50 | Mirrorless | APS-C | Film simulations, classic dials | ~$1,300–$1,400 |
| Nikon Z50 II | Mirrorless | APS-C | Excellent ergonomics, strong AF | ~$900–$1,000 |
| Canon EOS Rebel SL3 (used) | DSLR | APS-C | Budget option with optical viewfinder | ~$350–$500 used |
| OM System OM-5 | Mirrorless | Micro Four Thirds | Compact, weather-sealed | ~$1,100–$1,200 |
These are current top picks as of early 2026 — not permanent rankings. Verify current pricing before purchasing, and check independent reviews at DPReview and PetaPixel for hands-on testing details that match your shooting style.
💡 Try Before You Buy > > Ergonomics matter more than spec sheets suggest. Two cameras with nearly identical specs can feel completely different in your hands. If you can, visit a local camera shop and physically hold three or four bodies before committing. Grip depth, button placement, and menu layout are things you'll interact with thousands of times — get this right and you'll actually want to pick the camera up.
⚠️ Avoid: Judging a Camera by Megapixels Alone > > I see this constantly. A beginner sees "33 megapixels" on one camera and "24 megapixels" on another and assumes the higher number wins. Megapixel count is one factor, and not the most important one. Sensor size, dynamic range, autofocus performance, and the available lens lineup all matter more for most beginners. Higher megapixels also mean larger file sizes, slower buffers, and more storage needed. Unless you're printing large or cropping aggressively, 24MP is plenty.
What Camera Specs Actually Matter for Beginners?
- Manual mode (M): Non-negotiable. You need full control over aperture, shutter speed, and ISO to learn photography properly. Every camera I've recommended above has this.
- Sensor size: APS-C (crop sensor) is the sweet spot for most beginners — strong image quality, smaller bodies, more affordable lenses. Full-frame is overkill at the start and roughly doubles your lens costs.
- Autofocus: Modern phase-detect AF is fast and reliable. Eye-tracking AF is a genuine bonus for portrait and street shooting and now appears on most current entry-level mirrorless bodies.
- Video specs: If video matters, look for at least 4K at 30fps. Check the manufacturer's spec sheet for recording limits and overheating notes on your specific model.
- Ergonomics: Test in person where possible. A camera that feels wrong in your hands will sit in a drawer.
- Lens ecosystem: Pick a brand whose lens lineup you'd be happy with three years from now. Switching mounts later is expensive.
Is a DSLR Still Worth Buying in 2026?
Yes — with caveats. DSLRs remain capable cameras, and their prices on the used market have dropped sharply as manufacturers pivot to mirrorless. A used Canon Rebel SL3 or Nikon D5600 with a kit lens can land in the $300–$500 range and produce excellent images.
But here's the trade-off: most major manufacturers have effectively stopped new DSLR development. New lens releases for DSLR mounts have slowed to a trickle. If you're starting fresh in 2026 and plan to stick with photography long-term, an entry-level mirrorless body is the more future-proof choice.
If a specific used DSLR offers significantly better value at your budget — and you're okay with a smaller pool of new lenses going forward — it remains a perfectly valid option. Skills matter more than format.
Which Lens Should a Beginner Start With?
Lenses are where photographers fall down the rabbit hole. Keep it simple:
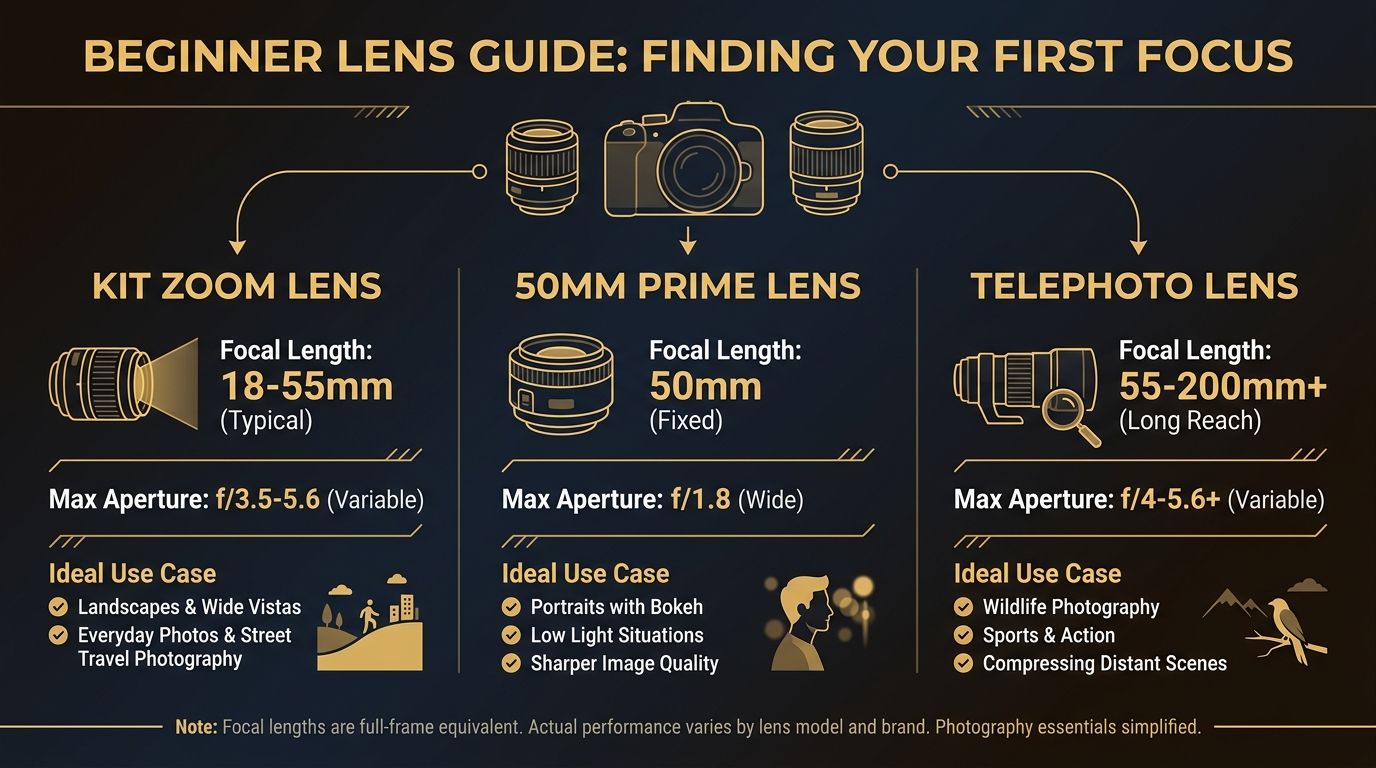
- Kit zoom lens (18-55mm or equivalent) — covers everyday focal lengths and teaches you what zoom range you actually use.
- 50mm f/1.8 prime lens — your best first upgrade for sharper images and beautiful background blur.
- Specialty lens (telephoto, wide-angle, macro) — only when your shooting consistently demands it.
💡 The Two-Lens Starter Strategy > > Shoot exclusively with your kit zoom for three months. Then add a 50mm f/1.8 prime (around $125–$250 depending on mount). That's it. This two-lens setup will pay for itself in your first three paid bookings if you go that route, and will cover 80% of what you'll ever want to shoot as a beginner. Most photographers buy seven lenses to figure out they really only needed two.
📘 Aperture and Focal Length Explained Simply > > Aperture is the size of the lens opening, measured in f-stops (f/1.8, f/4, f/16). Lower numbers = wider opening = more light + blurrier backgrounds. Higher numbers = smaller opening = less light + sharper front-to-back focus. Canon's primer on aperture and ISO is a solid one-page read. > > Focal length is how "zoomed in" the lens is, measured in millimeters. 18mm is wide (landscapes, interiors). 50mm is roughly what your eye sees. 200mm is telephoto (wildlife, sports). > > Crop factor: APS-C sensors multiply the effective focal length by ~1.5x (1.6x on Canon). So a 50mm lens on an APS-C camera frames more like a 75mm on full-frame.
Kit Zoom Lens: The Best Starting Point
The 18-55mm (or 16-50mm on some mirrorless systems) kit zoom bundled with most cameras is deliberately affordable. Manufacturers want to lower the entry barrier. Quality is adequate for learning — not professional work, but plenty for portfolio building and casual paid work.
Shoot the kit zoom exclusively for your first few months. Pay attention to what focal length you use most. If you keep ending up at 50mm, your next lens choice is obvious. If you're always at 18mm, consider a wider prime. The kit zoom is a diagnostic tool.
The 50mm Prime: The Best First Upgrade
A 50mm f/1.8 prime lens (or 35mm f/1.8 on APS-C for a similar field of view) is the single best value lens you can buy. Available for every major mount: Canon RF 50mm f/1.8, Sony FE 50mm f/1.8, Nikon Z 40mm f/2, Fujifilm XC 35mm f/2.
Why it's worth it:
- Wide f/1.8 aperture creates the blurred background ("bokeh") effect beginners admire in professional portraits
- Sharper than the kit zoom at any aperture
- Better in low light by roughly 2-3 stops
- Forces you to move your feet and think about composition (no zooming!)
- Usually costs $125–$250
Check your camera's mount compatibility before ordering. A Canon RF lens won't fit a Sony body.
When to Add a Telephoto or Specialty Lens
Add specialty lenses only when your shooting style consistently demands them — not speculatively because they look cool on someone's YouTube unboxing.
- Telephoto zoom (70-300mm): Wildlife, sports, events where you can't approach the subject. Expect $400–$800 for a decent option.
- Wide-angle (10-18mm or 16-35mm equivalent): Landscapes, architecture, real estate, interiors.
- Macro lens: Close-up product, nature, or jewelry work. Niche need.
If you're not sure whether you need one, you don't need one yet.
Supporting Gear: Tripods, Memory Cards, Batteries & Bags
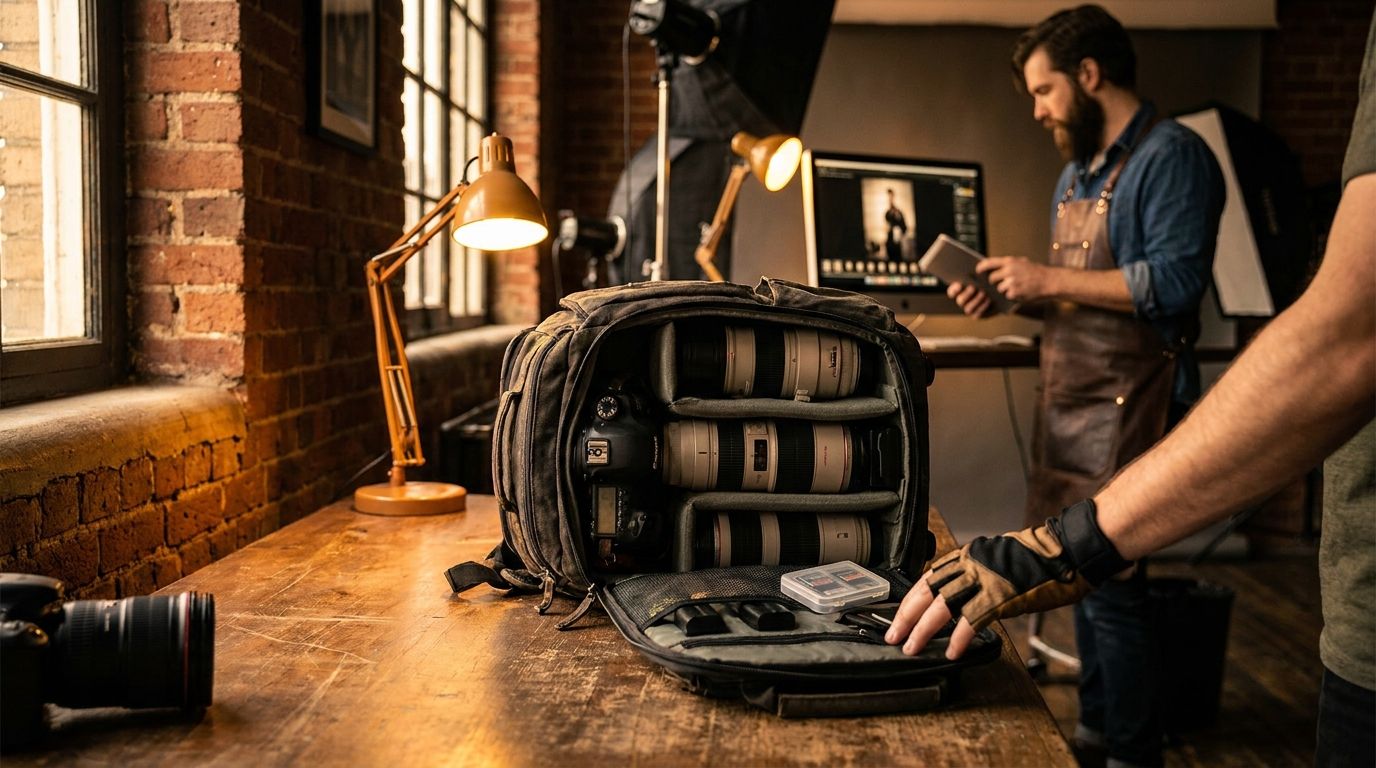
Your camera and lens get the glory, but the supporting gear is what keeps you shooting reliably. Here's the practical short version:
- Memory card: Minimum 64GB, UHS-I Speed Class 3 (V30) or faster — buy two
- Batteries: One spare OEM or reputable third-party battery per shooting session
- Tripod: Load capacity rated above your camera + heaviest lens weight; avoid the cheapest travel tripods
- Camera bag: Padded compartments, weather-resistant, fits your body + two lenses comfortably
📘 SD Card Speed Classes Explained > > SD cards use two main speed standards. UHS-I is the most common and affordable; UHS-II is faster but only useful if your camera supports it. Video Speed Class (V30, V60, V90) tells you the minimum sustained write speed in megabytes per second. For most beginners shooting stills and 1080p or 4K video, a V30 UHS-I card is sufficient. For high-bitrate 4K, 6K, or heavy burst shooting, check SanDisk's speed class documentation and your camera's manual for minimum requirements.
⚠️ Third-Party Batteries: What to Know > > OEM batteries (the kind your camera maker sells) are more reliable and last longer in cold weather, but cost $60–$90. Reputable third-party brands like Wasabi Power and Patona run $20–$35 and work fine in my experience for ~80% of conditions. Avoid the cheapest no-brand batteries on Amazon — capacity is inconsistent and there have been rare safety issues. Always buy from a known retailer with a return policy.
Choosing a Tripod That Won't Let You Down
I wasted about $150 on cheap tripods before I bought a decent one. Learn from my mistake.
- Load capacity is the most important spec. It must comfortably exceed the combined weight of your camera body and heaviest lens. If your kit weighs 1.5kg, look for a tripod rated for 3kg+ to give yourself safety margin.
- Aluminium vs carbon fibre: Aluminium is heavier but half the price. Carbon fibre is lighter and stiffer but expensive. As a beginner, get aluminium — your back will be fine.
- Ball heads vs pan-tilt heads: Ball heads are faster and more intuitive for stills. Pan-tilt heads give finer control for video. Most beginners want a ball head.
- Avoid the $25 tripods on Amazon. The legs flex under load, the locks slip, and the head won't hold your camera angled down. You're better off bracing on a wall.
- A Gorillapod (flexible mini tripod) is a useful supplement for travel and vlogging — not a replacement for a full-size tripod.
A solid beginner tripod (Manfrotto Compact Action, Vanguard Alta Pro 263, Sirui ET-1204) runs $80–$180.
What Camera Bag Should a Beginner Buy?
- Backpack style: Best for carrying gear all day — hiking, travel, full-day shoots. Distributes weight across both shoulders.
- Shoulder/sling bag: Faster access for street and event photography. Less comfortable for long distances.
- Look for: Removable padded dividers, weather-resistant fabric or rain cover, laptop sleeve if you edit on the go, comfortable straps.
- Size: For a beginner kit (one body, two lenses, accessories), a 15–20 litre backpack is plenty.
- Don't over-buy. A massive professional roller is overkill and makes you a target. Match the bag to your kit.
Solid options: Lowepro Tahoe, Peak Design Everyday Backpack 15L, Wandrd PRVKE 21L. Budget around $60–$200.
Beginner Photography Equipment by Budget
Let's break down the actual costs. Three tiers, real ranges, honest scope of what you get at each level.
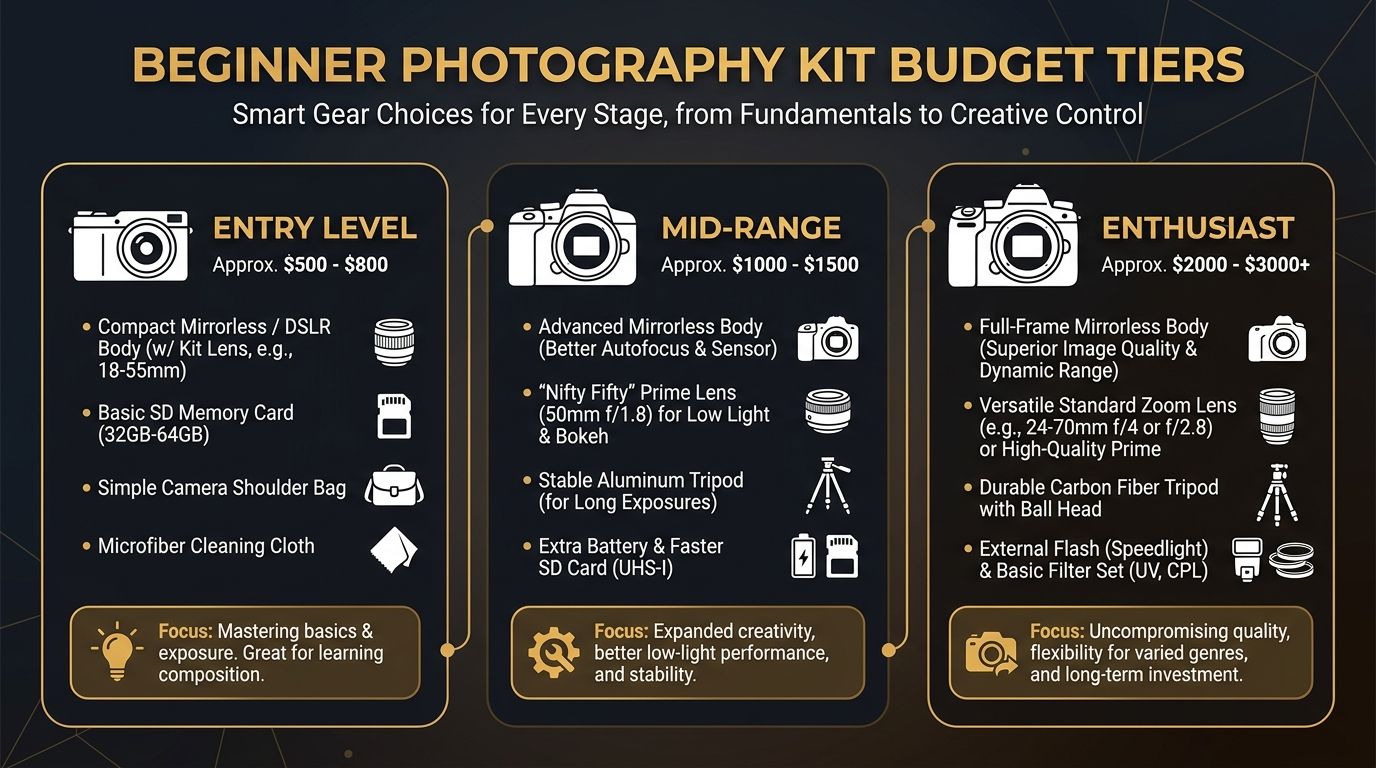
Beginner Photography Kit by Budget Tier
| Budget Tier | Approx. Total Range | What's Included | Best For |
|---|---|---|---|
| **Entry** | $400–$700 | Used or current entry-level APS-C mirrorless/DSLR with kit lens, 1 SD card, 1 spare battery, budget tripod, basic bag | Casual hobbyist, testing if photography is right for you |
| **Mid** | $700–$1,200 | New current entry-level mirrorless with kit lens, 50mm prime, 2 SD cards, 2 batteries, mid-range tripod, quality bag, cleaning kit | Committed hobbyist, aspiring portrait or travel photographer |
| **Enthusiast** | $1,200–$2,200 | New mid-range mirrorless with kit lens and 50mm prime, quality tripod, multiple batteries, fast SD cards, good bag, external hard drive for backups | Serious hobbyist or part-time freelancer |
Prices are approximate USD ranges as of early 2026 and vary by region, retailer, and whether you buy new or used. Verify current pricing at a major retailer like B&H Photo before purchasing.
💡 The Entry Tier Is Enough to Learn > > I cannot stress this enough. The Entry tier is genuinely sufficient to learn photography, develop real skills, and produce portfolio-quality work. I shot my first paid wedding with a kit that cost under $700 (used body, kit zoom, 50mm f/1.8, basic tripod). The bottleneck for a beginner is always skill, not gear quality. Don't let yourself believe the Mid tier kit will make you a better photographer than the Entry tier — it won't. Practice will.
💡 Budget Tip: Buy the Lens First > > If you're choosing between a more expensive camera body and a better lens at the same total budget, go with the better lens. Lenses retain value longer (good glass holds 70-80% of its value after 5 years; bodies often drop 40-50%), they're brand-transferable on the same mount when you upgrade bodies, and they have a larger impact on image quality. A great lens on a modest body beats a modest lens on a great body almost every time.
Should You Buy New or Used Photography Gear?
Short answer: yes, buy used — if you buy from a reputable certified reseller with a grading system and return policy. Used gear typically costs 30–50% less than new at the same performance level, which is a significant saving for a beginner. The risk is genuinely low when you buy from the right places.
Used Gear Inspection Checklist
- Check shutter count for cameras (most beginner cameras are rated for 50,000–100,000 actuations; under 20,000 is excellent)
- Inspect the sensor for dust or scratches using a solid white frame at f/16
- Test all physical buttons, dials, and the lens mount connection
- Check lens glass for fungus, haze, or severe scratches in direct light
- Verify the battery charges and holds charge correctly
- Confirm the item ships with all original accessories (charger, strap, caps)
- Only buy from graded/certified sellers or platforms with buyer protection
📘 Trusted Platforms for Used Gear > > Reputable used gear sources include KEH Camera, MPB, Adorama Used, B&H Used, and local camera stores. Each uses a standardized grading system (Excellent, Very Good, Good, etc.) so you know what you're getting. Be more cautious with eBay and Facebook Marketplace — deals exist, but require more due diligence and you have less recourse if something goes wrong. Adorama's used gear buying guide is worth reading before you click "buy."
How Much Can You Save Buying Used?
- Well-maintained used gear typically costs 30–50% less than new at the same performance level
- Camera bodies depreciate faster than lenses — bodies are a better used buy if you want to save on body costs, and lenses (especially primes) hold value well so used lens deals are also strong
- Buying used lets you access a mid-tier camera at an entry-tier budget — huge for committed beginners
- Risk is genuinely low when buying from a certified reseller with a return policy and standardized grading
I bought my second body used from MPB. It arrived in better condition than described, with under 8,000 shutter actuations, for 40% off retail. That's a normal experience with the right reseller, not a fluke.
Recommended Gear by Photography Style
Once you've shot for a few months, you'll start gravitating toward a specific style. Here's what to add when that happens.
Starter Gear Additions by Photography Style
| Photography Style | Must-Have Addition | Helpful Later Addition |
|---|---|---|
| **Portrait** | 50mm or 85mm prime lens | Reflector (5-in-1 collapsible) |
| **Landscape** | Sturdy tripod (upgrade quality), wide-angle lens | ND filter, polarizing filter |
| **Street** | Compact mirrorless body, 35mm prime | Wrist strap, discreet bag |
| **Wildlife / Sports** | Telephoto zoom (70-300mm or longer) | Fast SD card (V60+), monopod |
| **Travel** | Lightweight body, compact zoom | Travel tripod or Gorillapod, extra batteries |
💡 Not Sure Which Style Is Yours Yet? > > Don't pick a style — let it pick you. Shoot everything with your core kit for the first three to six months. You'll discover your preferred style organically by noticing which shoots you actually finish editing and which photos you keep coming back to. Most beginners I've mentored guessed wrong about their style early on, then bought gear they never used.
How to Store and Back Up Your Photos
The 3-2-1 backup rule means keeping 3 copies of your photos on 2 different storage types with 1 copy stored offsite or in the cloud. It's the standard professional photographers use because it survives every common failure mode: drive death, theft, fire, accidental deletion. Set it up from day one and you'll never lose a photo.
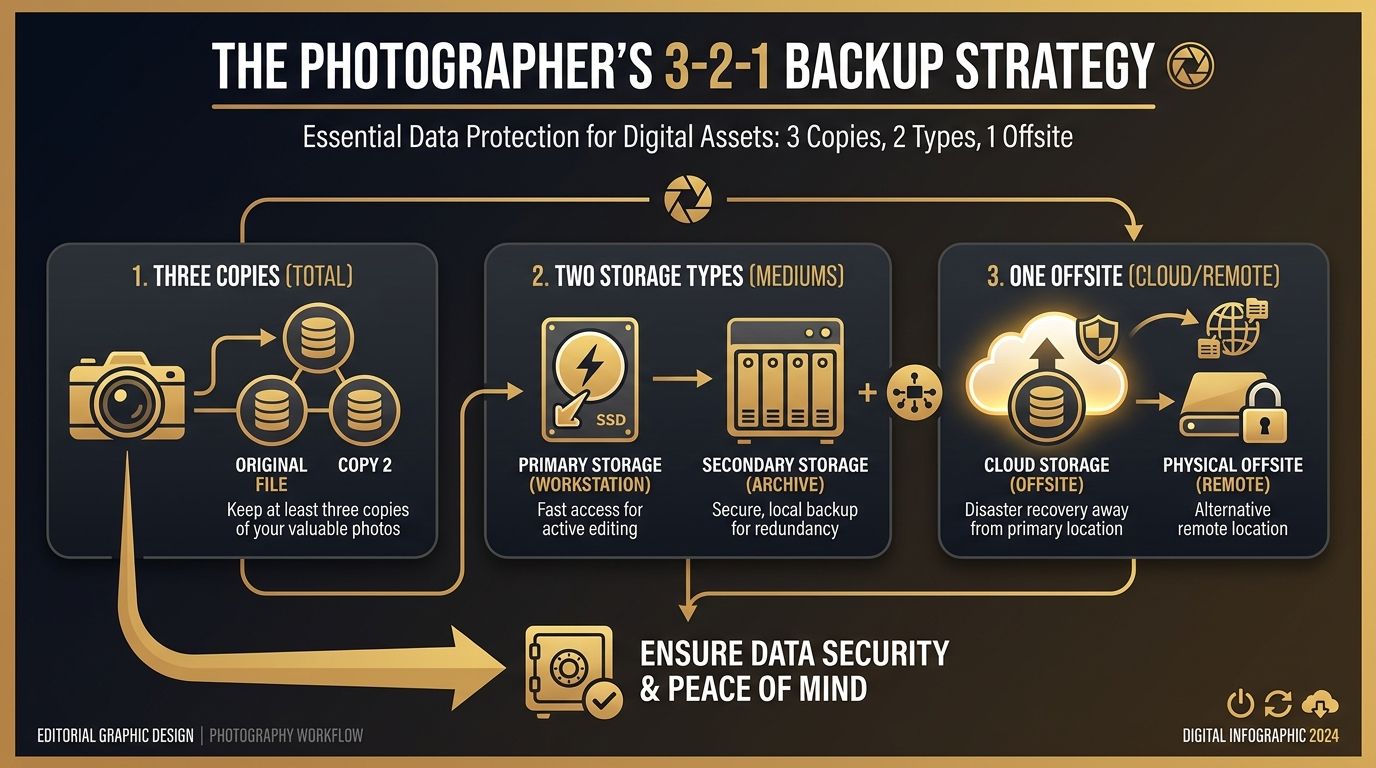
Photographer's 3-2-1 Backup Checklist
- Copy 1: Your primary working drive (laptop internal SSD or external SSD)
- Copy 2: A second local external hard drive dedicated to photo backups
- Copy 3: An offsite or cloud backup (Backblaze, Google Photos, Amazon Photos, or iCloud)
⚠️ Start This Habit on Day One > > I've lost count of the beginners who've messaged me about losing a year of photos because a single hard drive died. A portable 2TB drive runs $60–$80 and a Backblaze subscription is about $7/month. That's less than $150/year to never lose another photo. Compare that to the gut-punch of losing your kid's first birthday shoot to a corrupted SD card. Do it before you take your second shoot.
What Storage Gear Do You Need?
- Portable external hard drive (1–2TB): Adequate capacity for most beginners. Western Digital My Passport, Seagate Backup Plus, or Samsung T7 SSD (faster but pricier). Budget $60–$150.
- Card reader: If your laptop lacks an SD card slot, a USB-C card reader is small and cheap ($15–$30). Much faster than connecting your camera directly.
- Cloud storage: Free tiers from Google Photos, Amazon Prime Photos (for Prime members), or iCloud handle early photo volumes. Backblaze ($7/month) backs up your entire computer including all photos automatically — my recommendation once your library outgrows free tiers.
- File naming convention: Set up a simple folder structure on day one. I use Year > Month > Shoot Name (e.g.,
2026 > 03 March > Sarah Family Session). It costs nothing and saves hours later.
Basic Photo Editing Software Options
- Adobe Lightroom Classic (subscription, ~$10–$20/month): The industry standard. Virtually every tutorial on YouTube uses it. Worth the cost once you're committed.
- Darktable (free, open-source): A capable Lightroom alternative if you're on a tight budget. Steeper learning curve.
- Capture One (subscription or perpetual license): Professional-grade, particularly strong for Fujifilm and Phase One files. Popular among working pros.
- Manufacturer software (Canon Digital Photo Professional, Nikon NX Studio, Sony Imaging Edge): Free, integrates with your camera's RAW files. A solid starting point before you commit to a paid subscription.
Optional Extras Worth Considering Later
Here's the gear you'll see in every YouTube unboxing that you absolutely do not need on day one. Buy these as specific needs emerge in your shooting — not speculatively.
Optional Extras — Buy When Relevant
- External flash / speedlight: For events, indoor portraits, or fill light. Buy when natural light consistently isn't enough. Godox TT350 or Yongnuo YN560 IV are solid beginner options ($60–$120).
- Polarizing filter (CPL): Reduces glare on water and glass, deepens skies. Worth it for landscape shooters. $30–$80 for a decent one.
- ND (Neutral Density) filter: Allows slow shutter speeds in bright conditions — waterfalls, seascapes, long exposure video. $40–$120.
- Remote shutter release: Eliminates camera shake for long exposures and self-portraits. $15–$40, or free via your camera's smartphone app.
- Reflector: A 5-in-1 collapsible reflector is around $20 and dramatically improves portrait lighting.
- Lens hood: Reduces flare and protects the front element from bumps. Usually included with the lens — use it.
- Laptop or desktop computer: Needed for editing RAW files. Your existing machine is fine to start; upgrade when render times become painful.
- Photography insurance: Consider if you start earning money from photography or travel internationally with expensive gear. Check specialist providers in your region.
⚠️ Resist Gear Acquisition Syndrome > > There's a name for the trap: Gear Acquisition Syndrome (G.A.S.). It's the constant urge to buy more equipment instead of using what you have. Every hour spent watching gear reviews is an hour not spent shooting. I've owned over 30 lenses over my career and used maybe six regularly. A camera and one lens are genuinely enough to build strong skills. Want to actually improve? Close the browser tab and go shoot 200 frames this weekend.
Common Beginner Gear Mistakes to Avoid
These are the costly mistakes I see beginners make every single month. Avoid them and you'll save yourself $500–$2,000 in wasted purchases.
Mistakes That Cost Beginners Time and Money
- Buying a full-frame camera as a first camera. Full-frame bodies and lenses cost roughly double APS-C equivalents, weigh more, and offer no practical benefit until you've outgrown your APS-C system. Save the money. Start APS-C, upgrade if and when you actually hit a wall.
- Prioritizing megapixels over lens quality. A mediocre lens on a 33MP body produces mediocre results — the lens is the more important investment. Spend less on the body, more on glass.
- Buying a flimsy tripod to save money. A $25 tripod that vibrates or collapses under load is worse than no tripod. Spend $80–$180 once and be done.
- Skipping backup gear (SD card, spare battery) to save $30. Running out of storage or power mid-shoot is avoidable. If you're shooting for someone else, it's professionally damaging.
- Buying too many accessories before you know what you shoot. Lenses, filters, and flashes bought speculatively almost always go unused. Wait until a specific need is proven by your actual shooting habits.
- Ignoring ergonomics. A camera that feels uncomfortable or whose menus confuse you will sit on the shelf. Test in person before buying whenever possible.
Frequently Asked Questions About Photography Equipment for Beginners
What is the minimum photography equipment a beginner needs?
The true minimum is a camera with manual mode, one lens, one memory card, and one battery. Everything else — tripods, bags, flashes — improves your experience but is not required to take your first photos and start learning. A padded bag and spare battery should be added quickly to protect your investment and prevent frustrating interruptions.
Is a DSLR or mirrorless camera better for beginners in 2026?
For beginners starting in 2026, an entry-level mirrorless camera is generally the better choice: they're compact, feature-rich at entry-level price points, and represent the direction major manufacturers are developing. However, a quality used DSLR remains a perfectly capable and often cheaper option — the format matters far less than consistent practice.
How much should I spend on my first beginner photography kit?
A functional beginner kit can be assembled for approximately $400–$700 buying used or choosing entry-level models; a new mid-tier kit with a prime lens upgrade typically ranges from $700–$1,200. These are approximate ranges as of early 2026 and vary significantly by region and retailer — verify current prices before purchasing.
Do I need a tripod as a beginner photographer?
A tripod is genuinely useful rather than optional for long exposures, low-light photography, self-portraits, and consistent landscape framing. It's not needed for every type of shooting — street and event photographers often shoot handheld entirely. Include it in your starter kit if you plan to shoot landscapes, architecture, or in low-light conditions.
Should beginners buy used photography gear?
Yes — buying used from a reputable certified reseller (such as KEH, MPB, or Adorama Used) is an excellent way to save 30–50% on quality gear. Use the inspection checklist in this guide and only buy from platforms with standardized grading and a return policy. Avoid the cheapest ungraded listings from unknown sellers.
What is the best first lens for a beginner photographer?
Start with the 18-55mm (or equivalent) kit zoom that comes bundled with most beginner cameras — it covers a useful focal range and lets you learn without spending extra. The best first upgrade is a 50mm f/1.8 prime lens for your camera's mount: it's typically affordable, produces sharp images with pleasing background blur, and teaches deliberate composition.
Can I start learning photography with just a smartphone?
Absolutely — modern smartphones take excellent photos and many skilled photographers began on phones. A dedicated camera becomes worthwhile when you want to learn manual exposure controls, experiment with interchangeable lenses, or pursue photography beyond casual sharing. Start where you are and upgrade when your current tool consistently limits you.
What memory card size and speed do I need as a beginner?
For most beginners, a 64GB UHS-I card rated V30 (Video Speed Class 30) is a reliable starting choice for stills and standard HD/4K video. Buy two — one to shoot with and one as a spare. Check your specific camera model's manual or manufacturer website for any minimum speed requirements, especially if shooting high-bitrate 4K video.